Getting Started: Capture Your First Test Execution in 10 Minutes
See your test executions captured in the Obvyr dashboard. Fast setup, zero workflow disruption.
How Obvyr Works
Obvyr provides test-level insights by parsing JUnit XML output from your test runs. When you wrap your test command with obvyr-cli, it captures the JUnit XML file and parses individual test results to identify flaky tests, track pass rates, and monitor execution times. Without JUnit XML, Obvyr only captures command output without test-level insights.
Choosing Your Integration
| Stack | Recommended approach |
|---|---|
| Most stacks (Python, Node, Ruby, Go, …) | Obvyr CLI — wraps any command; this guide covers it |
| JVM / Gradle projects | Gradle plugin — hooks into test tasks, no wrapper needed |
| Everything else | Collect API — submit data directly when no SDK exists yet |
This guide walks through the CLI. If you're on a Gradle project, head to the Gradle plugin page instead.
What You'll Achieve
By following this guide, you'll:
- Create a project and agent in Obvyr
- Install the Obvyr CLI
- Configure JUnit XML output from your tests
- Run your first wrapped test command
- See test-level insights in your dashboard
Time: ~10 minutes Result: Your tests now contribute to pattern analysis and flaky test detection
Prerequisites
Before you start, ensure you have:
- Python 3.12 or later installed
- An existing test runner that generates JUnit XML output (e.g.,
pytest,npm test,mvn test,gradle test,go test) - Access to Obvyr with permissions to create projects
JUnit XML for Test-Level Insights
While Obvyr captures all command executions, JUnit XML output enables test-level insights (individual test pass rates, flaky test detection, execution times). Most test frameworks support JUnit XML output:
- pytest:
pytest --junitxml=test-results/junit.xml tests/ - npm/Jest: Configure
jest.config.jswithreporters: ['default', 'jest-junit'] - Maven: JUnit XML generated automatically in
target/surefire-reports/ - Gradle:
test { reports.junitXml.enabled = true } - Go:
go test -v 2>&1 | go-junit-report > test-results/junit.xml
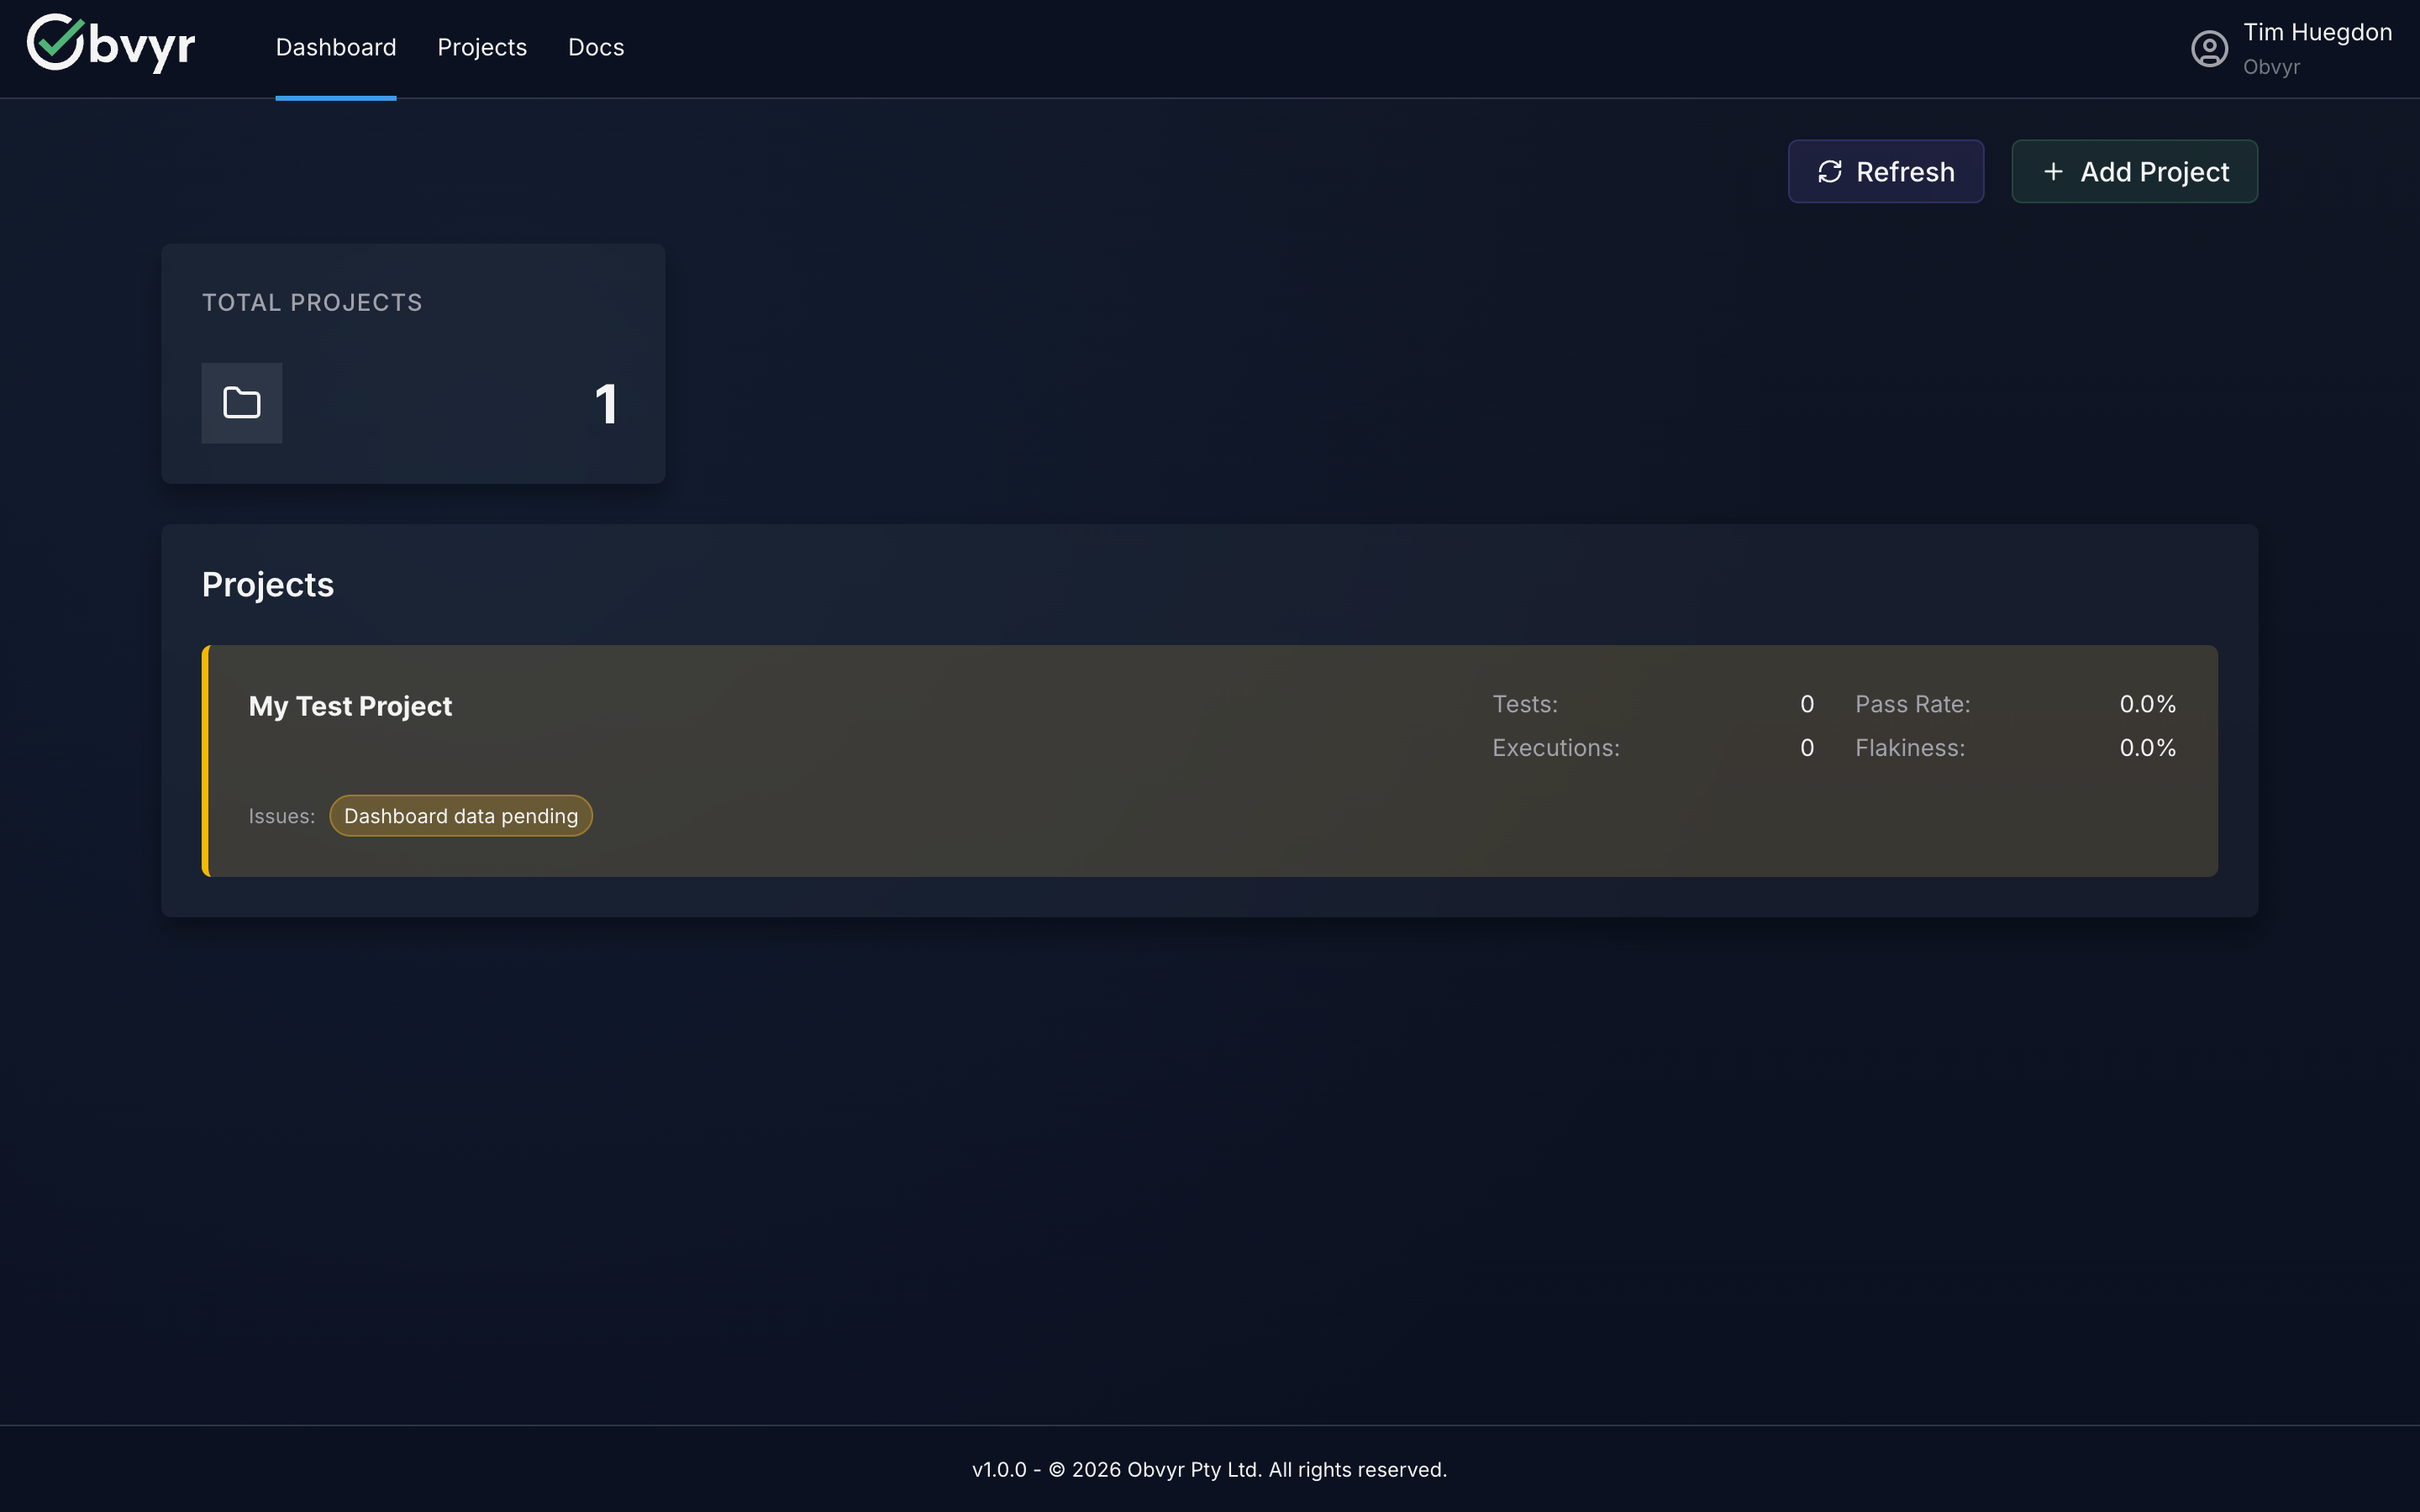
Step 1: Create Your Project (1 minute)
- Log into the Obvyr dashboard
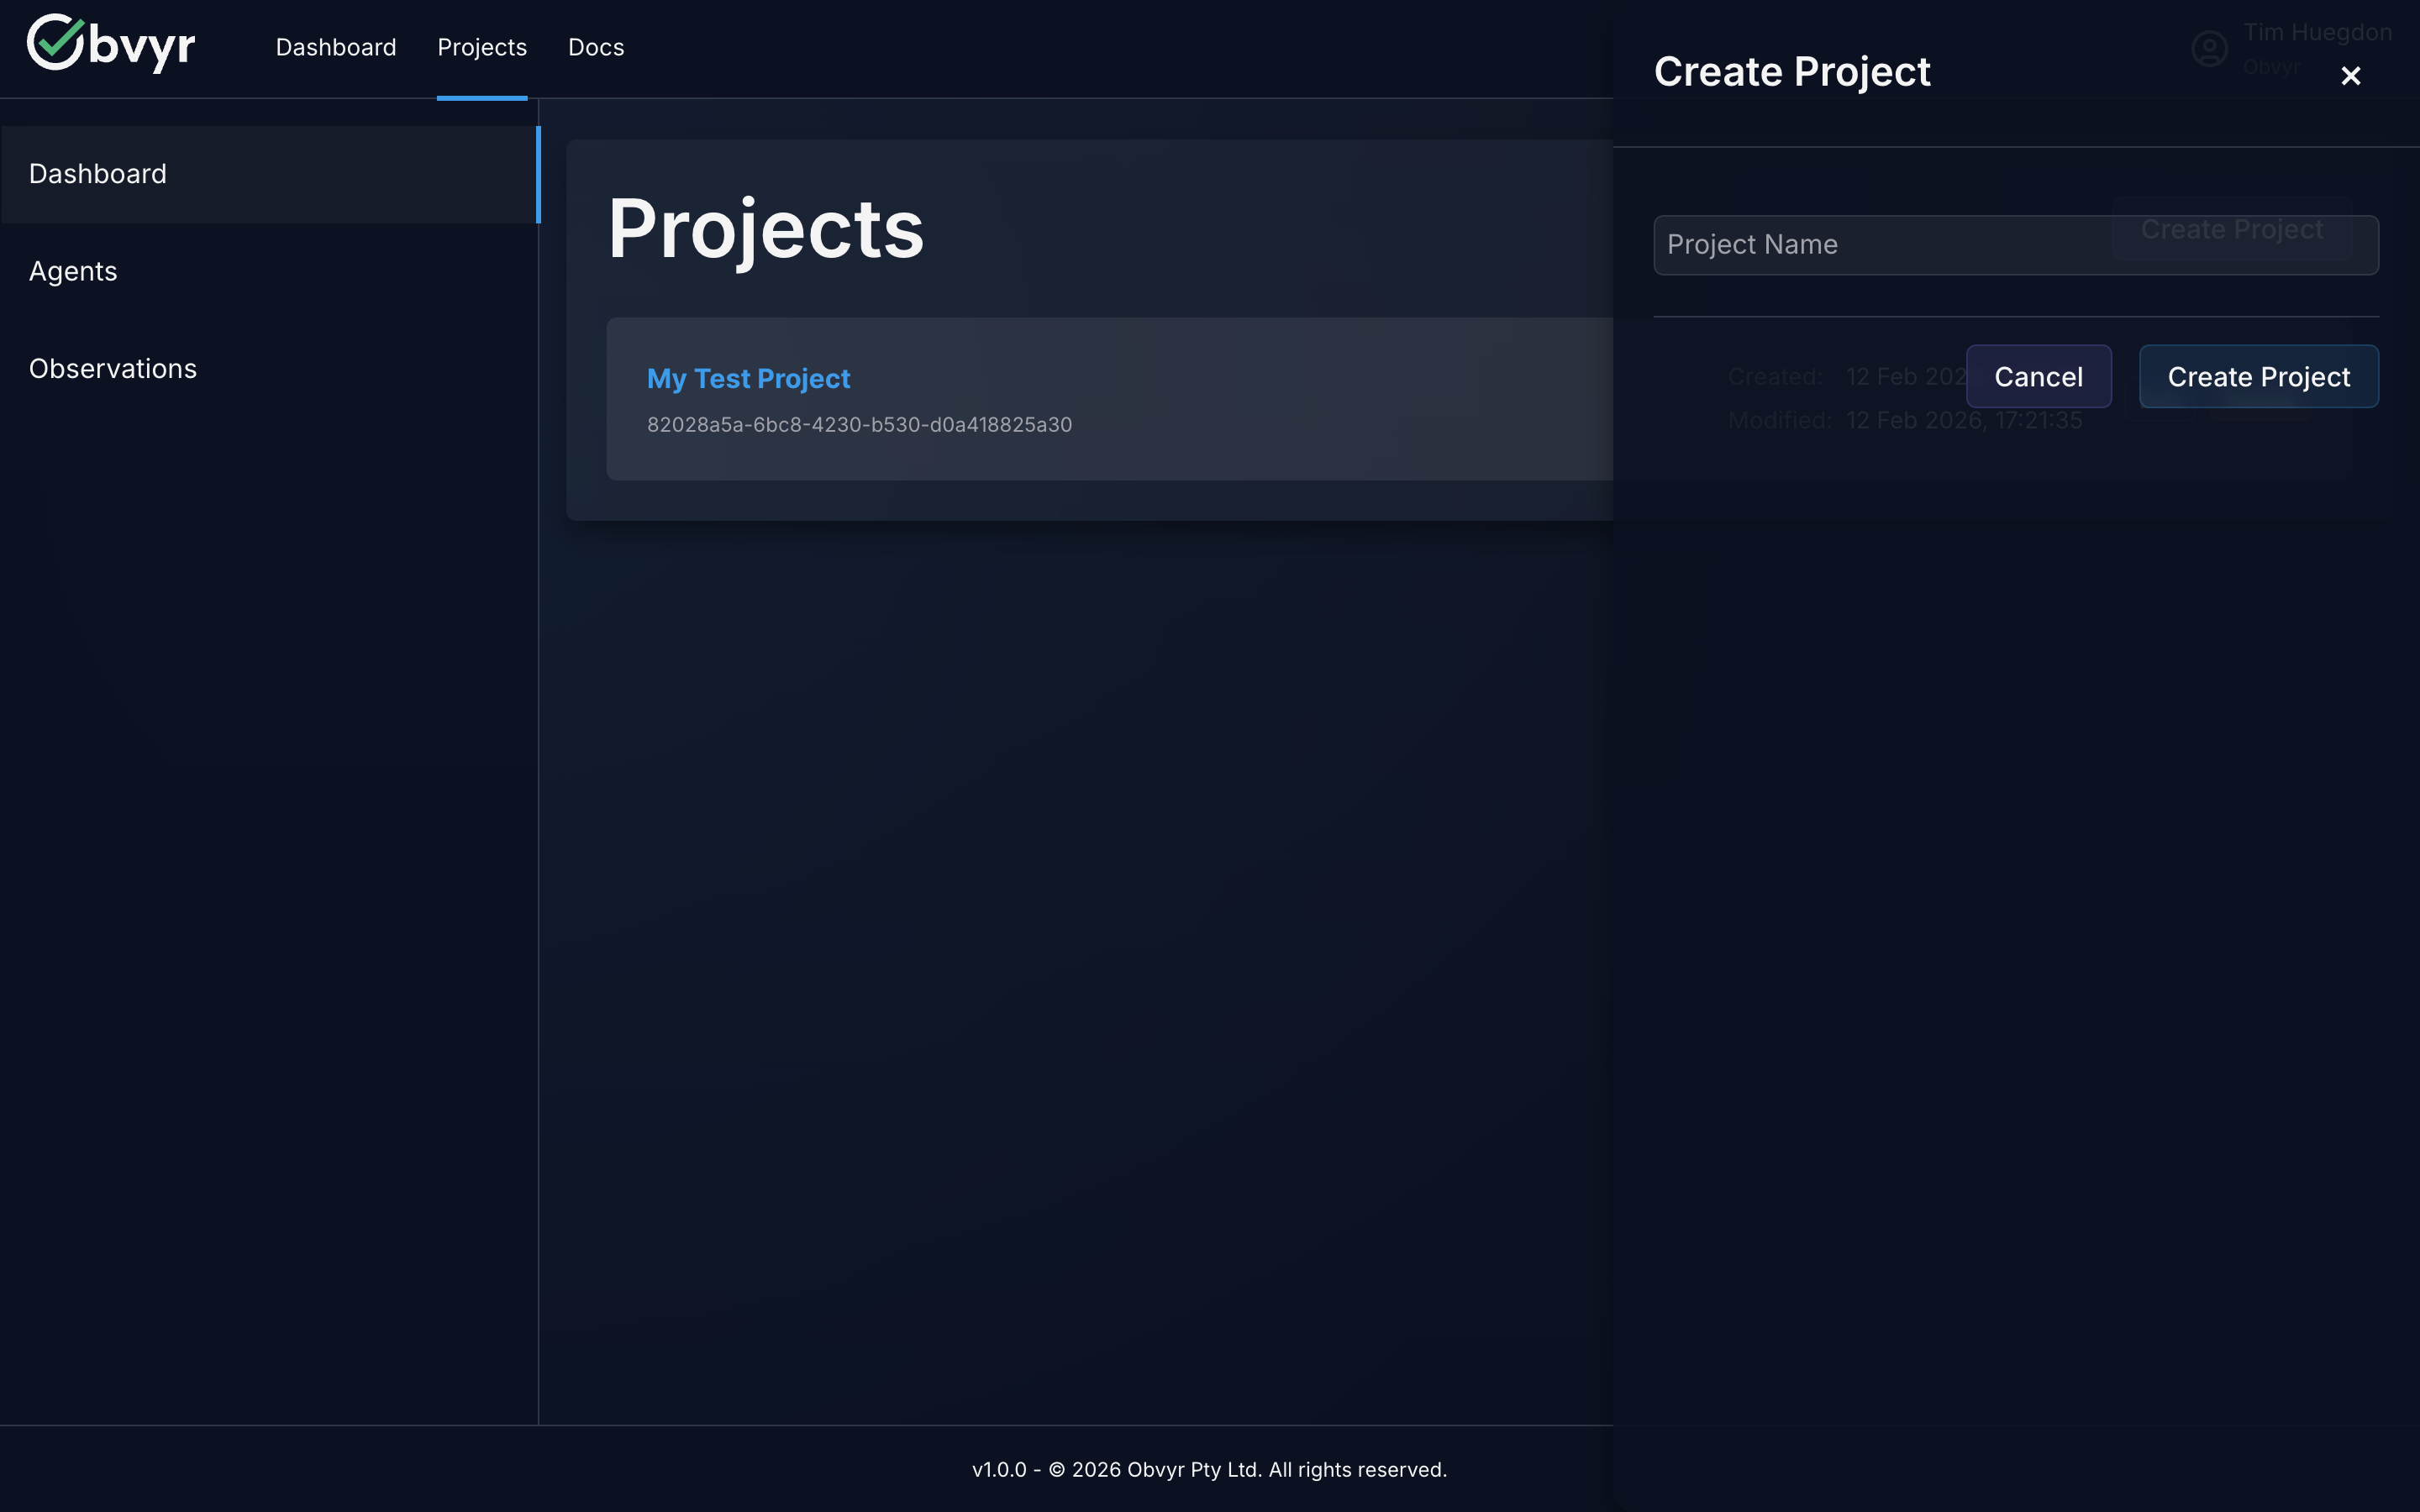
- Navigate to Projects
- Click Create Project
- Enter a project name (e.g., "My API", "Frontend App")
Project Names
Choose names that help you organise your test data: by codebase, by team, or by environment.
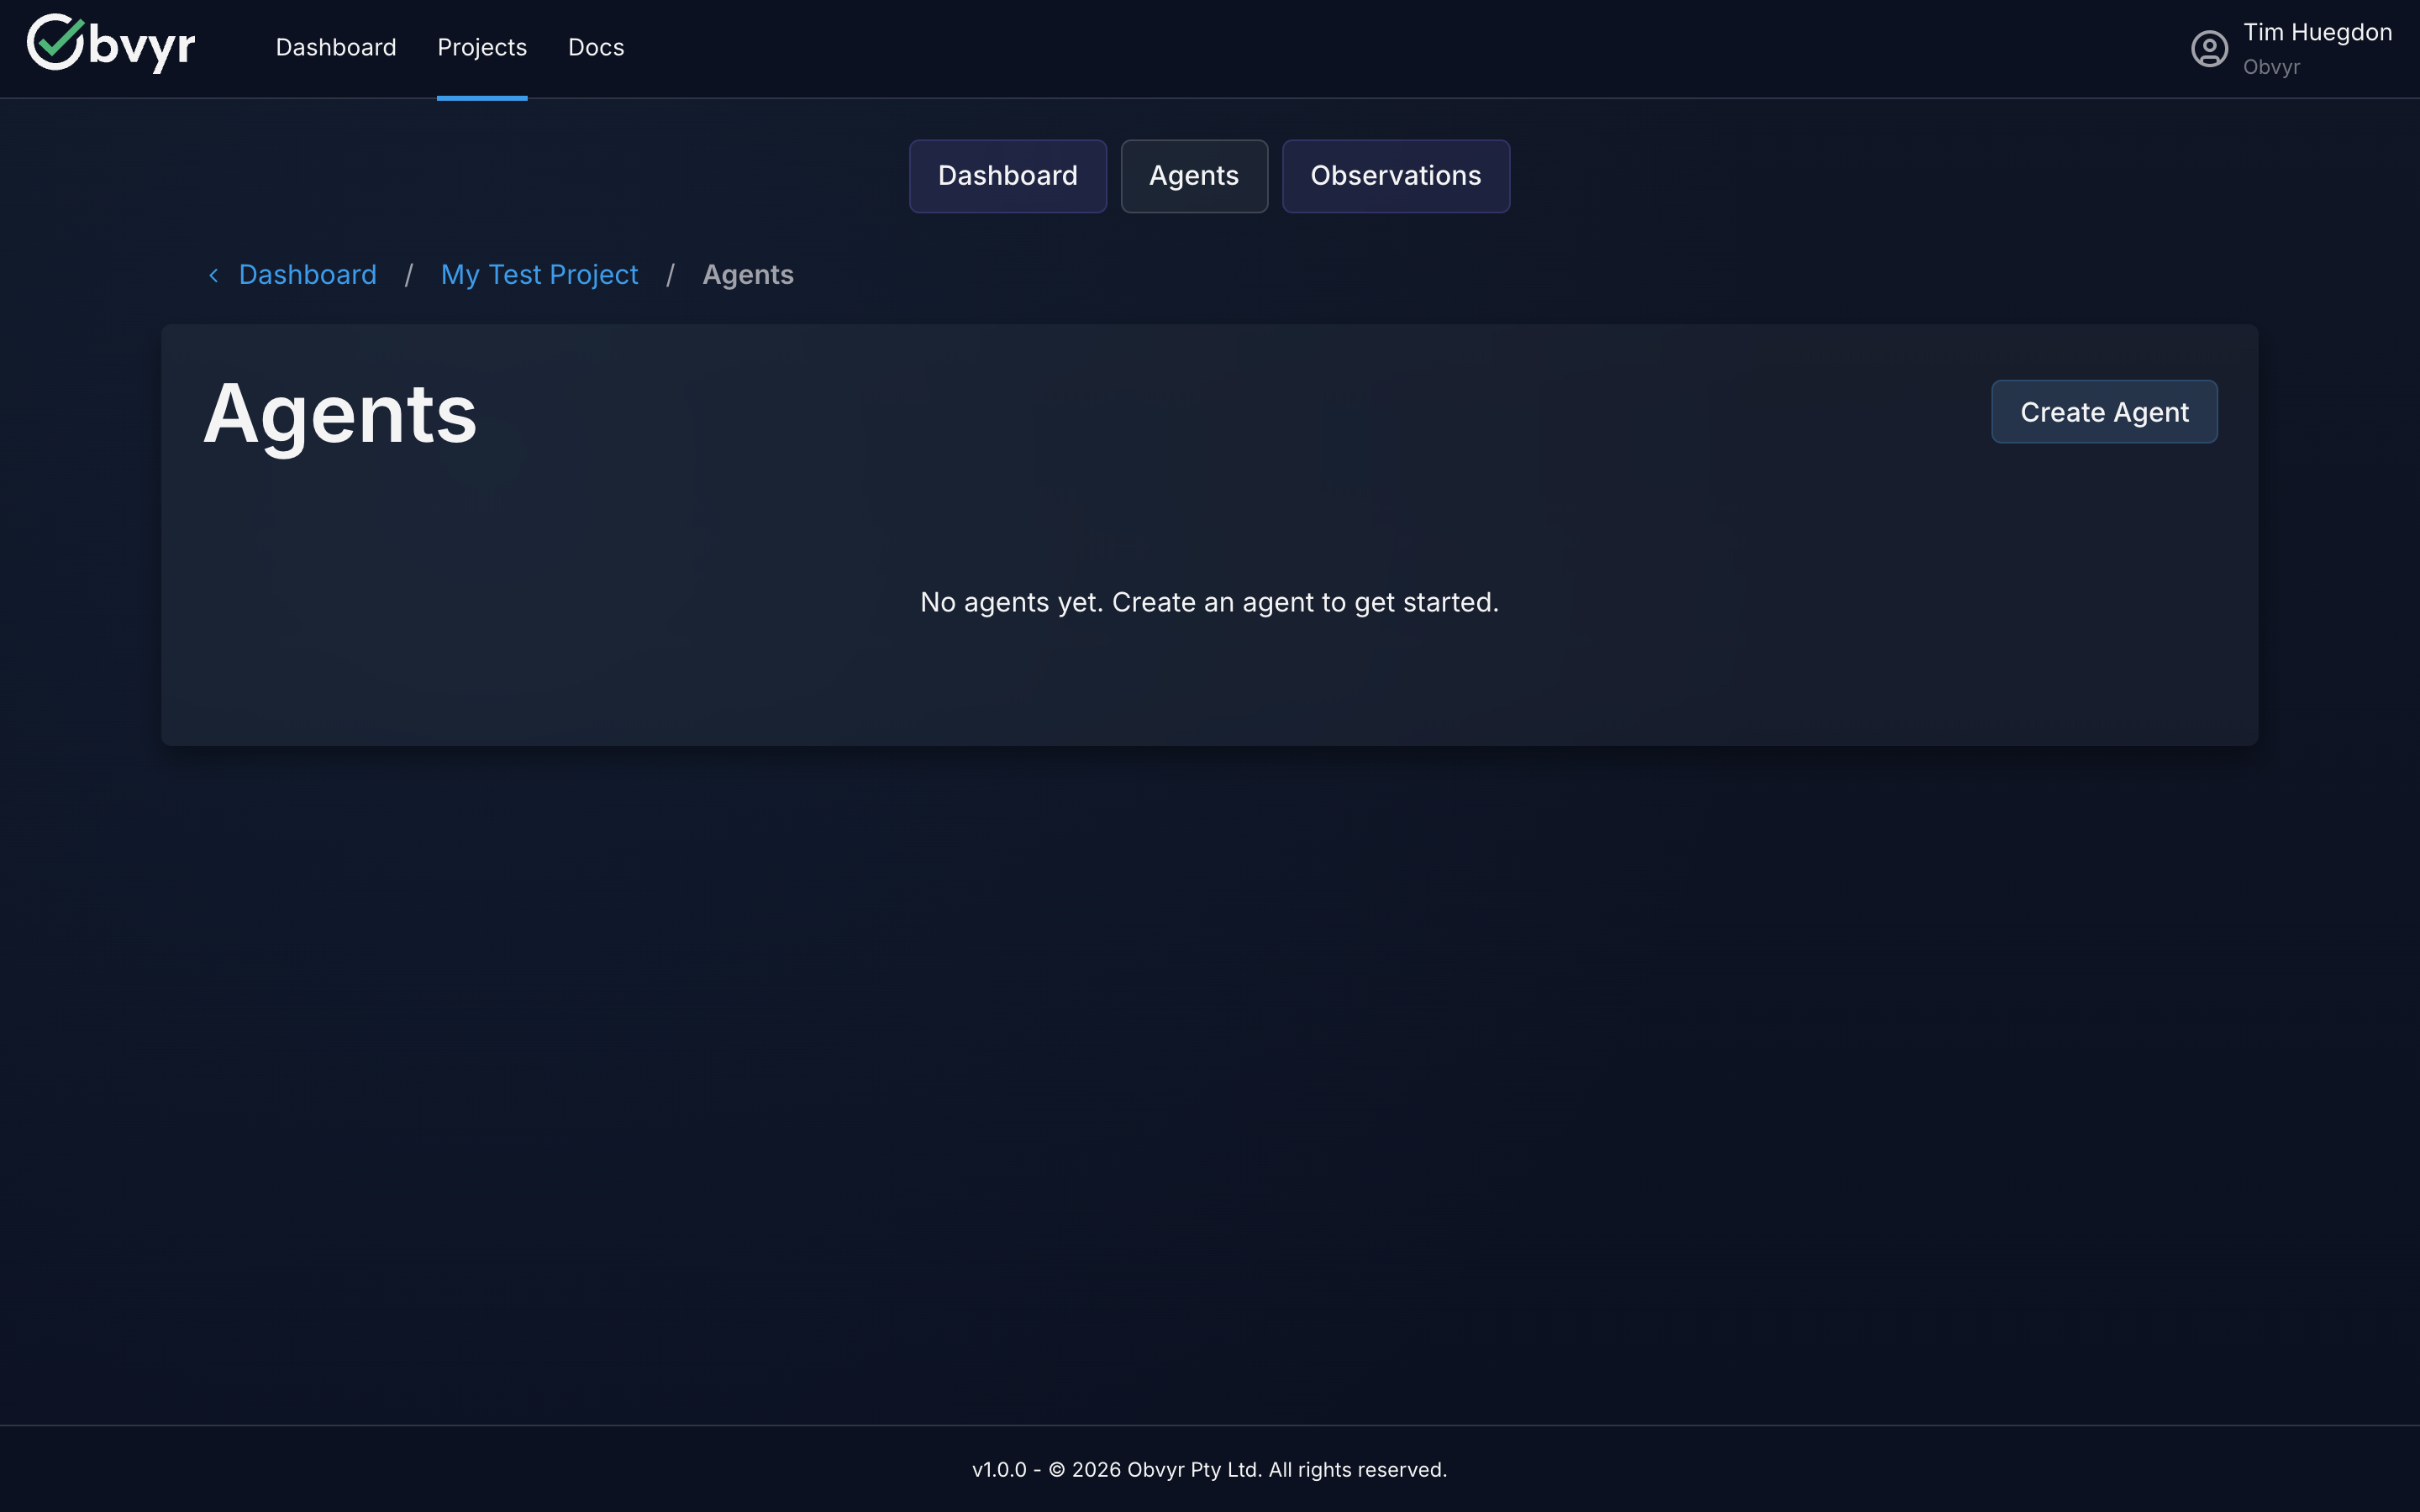
Step 2: Create Your CLI Agent (1 minute)
- Open your newly created project
- Click Create Agent
- Name your agent based on what it will monitor (e.g., "Unit Tests", "Lint", "Type Check")
- Copy the API token - it's only shown once!
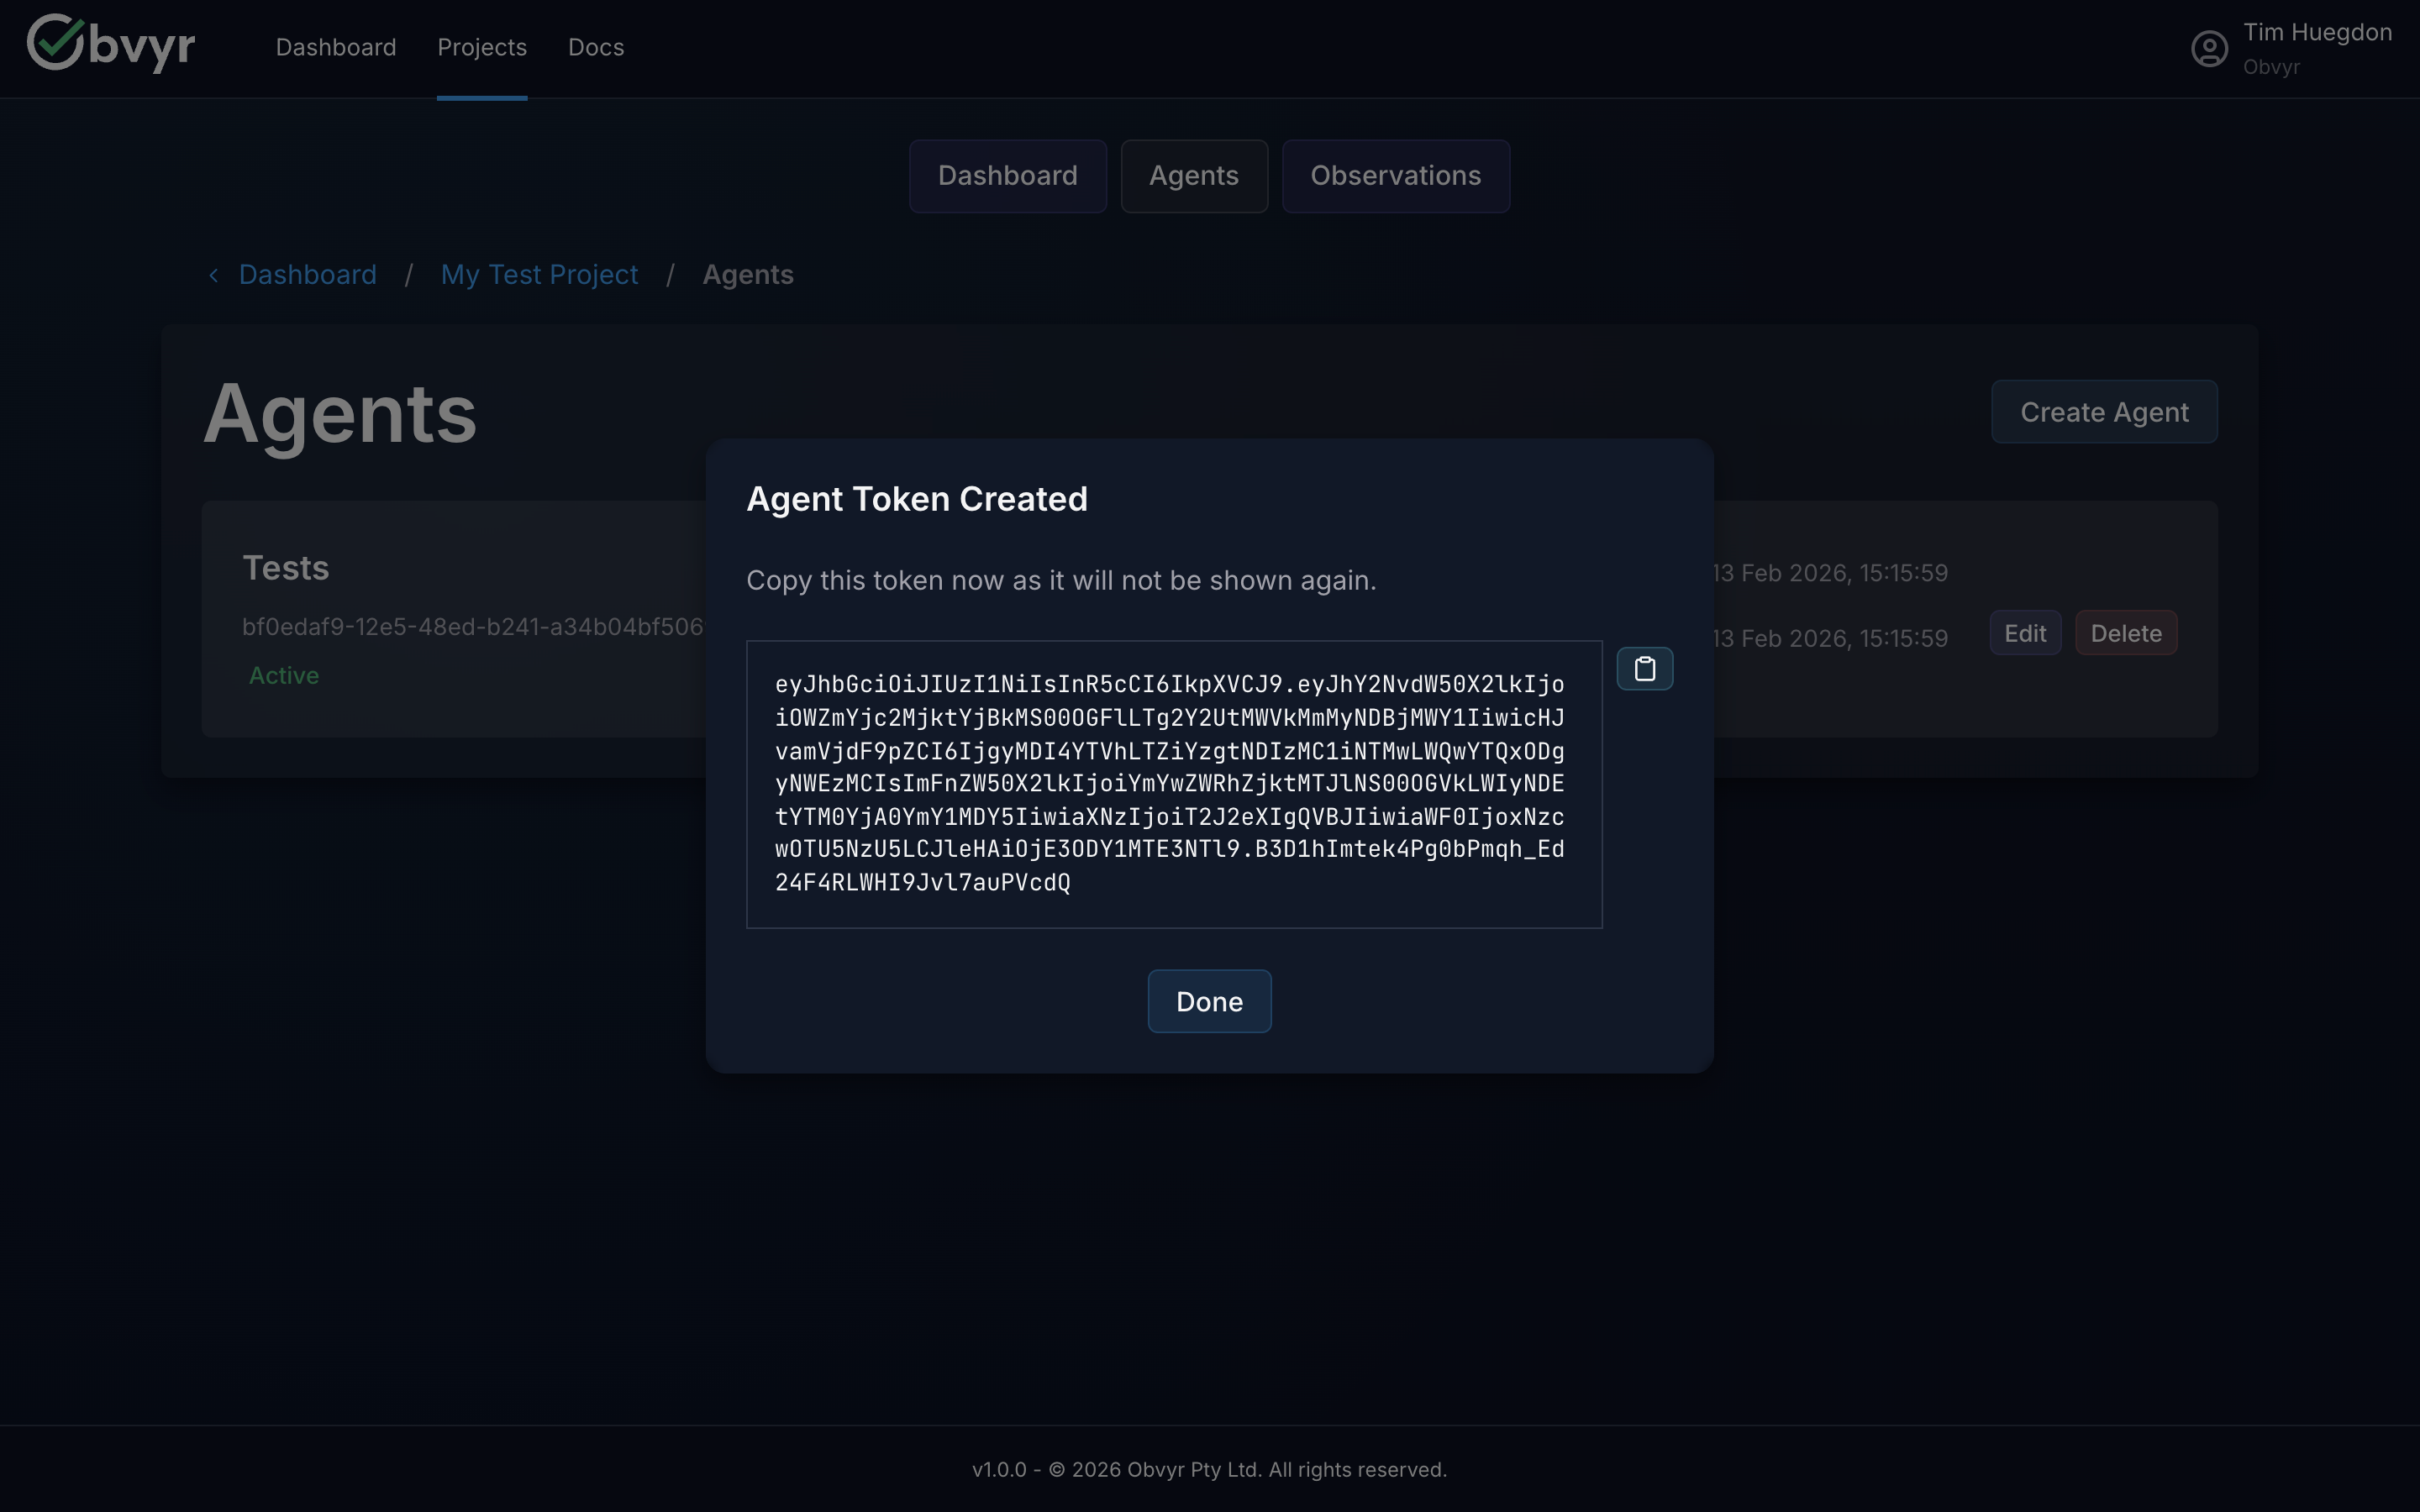
Keep Your API Token Safe
Treat this token like a password. Store it as an environment variable, never commit it to source control.
Why Separate Agents?
Different test types have different patterns. Separate agents let Obvyr analyse each type independently:
- Unit tests might be flaky due to timing issues
- Linting is deterministic but slow
- Type checking catches specific bug classes
Separate agents give you targeted insights for each.
Step 3: Install the Obvyr CLI (2 minutes)
Obvyr CLI is distributed as a Python package via PyPI. Choose your installation method:
Option A: uvx (Recommended - Fast & Simple)
Runs obvyr-cli without persistent installation. Fast, always uses latest version, perfect for CI/CD.
bash
# Install uv (if not already installed)
brew install uv          # macOS
pip install uv           # Linux / Windows

# Verify
uvx obvyr-cli --version
With uvx, prepend uvx obvyr-cli to your test commands (see Step 5).
Option B: pipx (Isolated Installation)
Installs obvyr-cli in an isolated environment that won't conflict with your projects.
bash
# Install pipx (if not already installed)
brew install pipx        # macOS
pip install pipx         # Linux / Windows

# Install obvyr-cli
pipx install obvyr-cli
Verify installation:
bash
obvyr-cli --versionOption C: pip (Traditional Installation)
No extra tools needed (pip comes with Python). Installs directly in current Python environment. May conflict with project dependencies.
bash
pip install obvyr-cliVerify installation:
bash
obvyr-cli --versionStep 4: Configure the CLI (2 minutes)
Set your API token, user identifier, and JUnit XML attachment path:
Option A: Environment Variables
bash
# Required: API token from Step 2
export OBVYR_PROFILES__DEFAULT__API_KEY="your-token-here"

# Required: Path to JUnit XML file for test-level insights
export OBVYR_PROFILES__DEFAULT__ATTACHMENT_PATHS="test-results/junit.xml"

# Recommended: Execution context identifier (NOT individual names)
export OBVYR_CLI_USER="local-dev"
Option B: .env File
Create a .env file in your project directory:
bash
# Required: API token from Step 2
OBVYR_PROFILES__DEFAULT__API_KEY=your-token-here

# Required: Path to JUnit XML file for test-level insights
OBVYR_PROFILES__DEFAULT__ATTACHMENT_PATHS=test-results/junit.xml

# Recommended: Execution context identifier (NOT individual names)
OBVYR_CLI_USER=local-dev
OBVYR_CLI_USER: Context Not Identity
Use OBVYR_CLI_USER to identify the execution context, not individual people:
- ✅ Good:
local-dev,github-ci,jenkins-runner,automation - ❌ Avoid: Individual names or usernames (data protection/privacy)
This helps you analyse patterns by environment (local vs CI, developer vs automation) without collecting personal data.
JUnit XML Required for Insights
The ATTACHMENT_PATHS configuration tells Obvyr where to find your JUnit XML file. Without this, Obvyr only captures command output - you won't get test-level insights (pass rates, flaky detection, individual test metrics).
Exclude .env from Version Control
Add .env to your .gitignore to prevent accidentally committing your API token.
Advanced Configuration
These are the essential settings for test-level insights. For advanced options (tags, multiple attachment paths, multiple profiles), see the CLI Configuration guide.
Step 5: Run Your First Wrapped Command (2 minutes)
Wrap your existing test command:
If using uvx (recommended):
bash
# Python (pytest)
uvx obvyr-cli pytest --junitxml=test-results/junit.xml tests/

# JavaScript/TypeScript (npm)
uvx obvyr-cli npm test

# Java (Maven)
uvx obvyr-cli mvn test
If using pipx or pip:
bash
# Python (pytest)
obvyr-cli pytest --junitxml=test-results/junit.xml tests/

# JavaScript/TypeScript (npm)
obvyr-cli npm test

# Java (Maven)
obvyr-cli mvn test
JVM/Gradle project?
The dedicated Gradle plugin is the recommended approach — it hooks directly into your test task with no wrapper needed.
What happens: Your tests run exactly as before. The CLI captures comprehensive execution data (stdout/stderr, timing, exit code, environment) and sends it to Obvyr.
What Obvyr Captures
The CLI captures complete execution context:
- Command output (stdout and stderr) - Analyse failure patterns
- Execution duration - Identify slowdowns over time
- Exit code - Track success/failure status
- User - Understand who ran the command
- Timestamp and environment - Compare execution patterns
- Test framework metadata (e.g., JUnit XML) - Deep test-level insights
Individual observations are data points. Patterns across 50+ observations become insights.
Step 6: View Your Observation in the Dashboard (1 minute)
- Return to the Obvyr dashboard
- Navigate to your project → your agent
- See your first observation with complete execution details
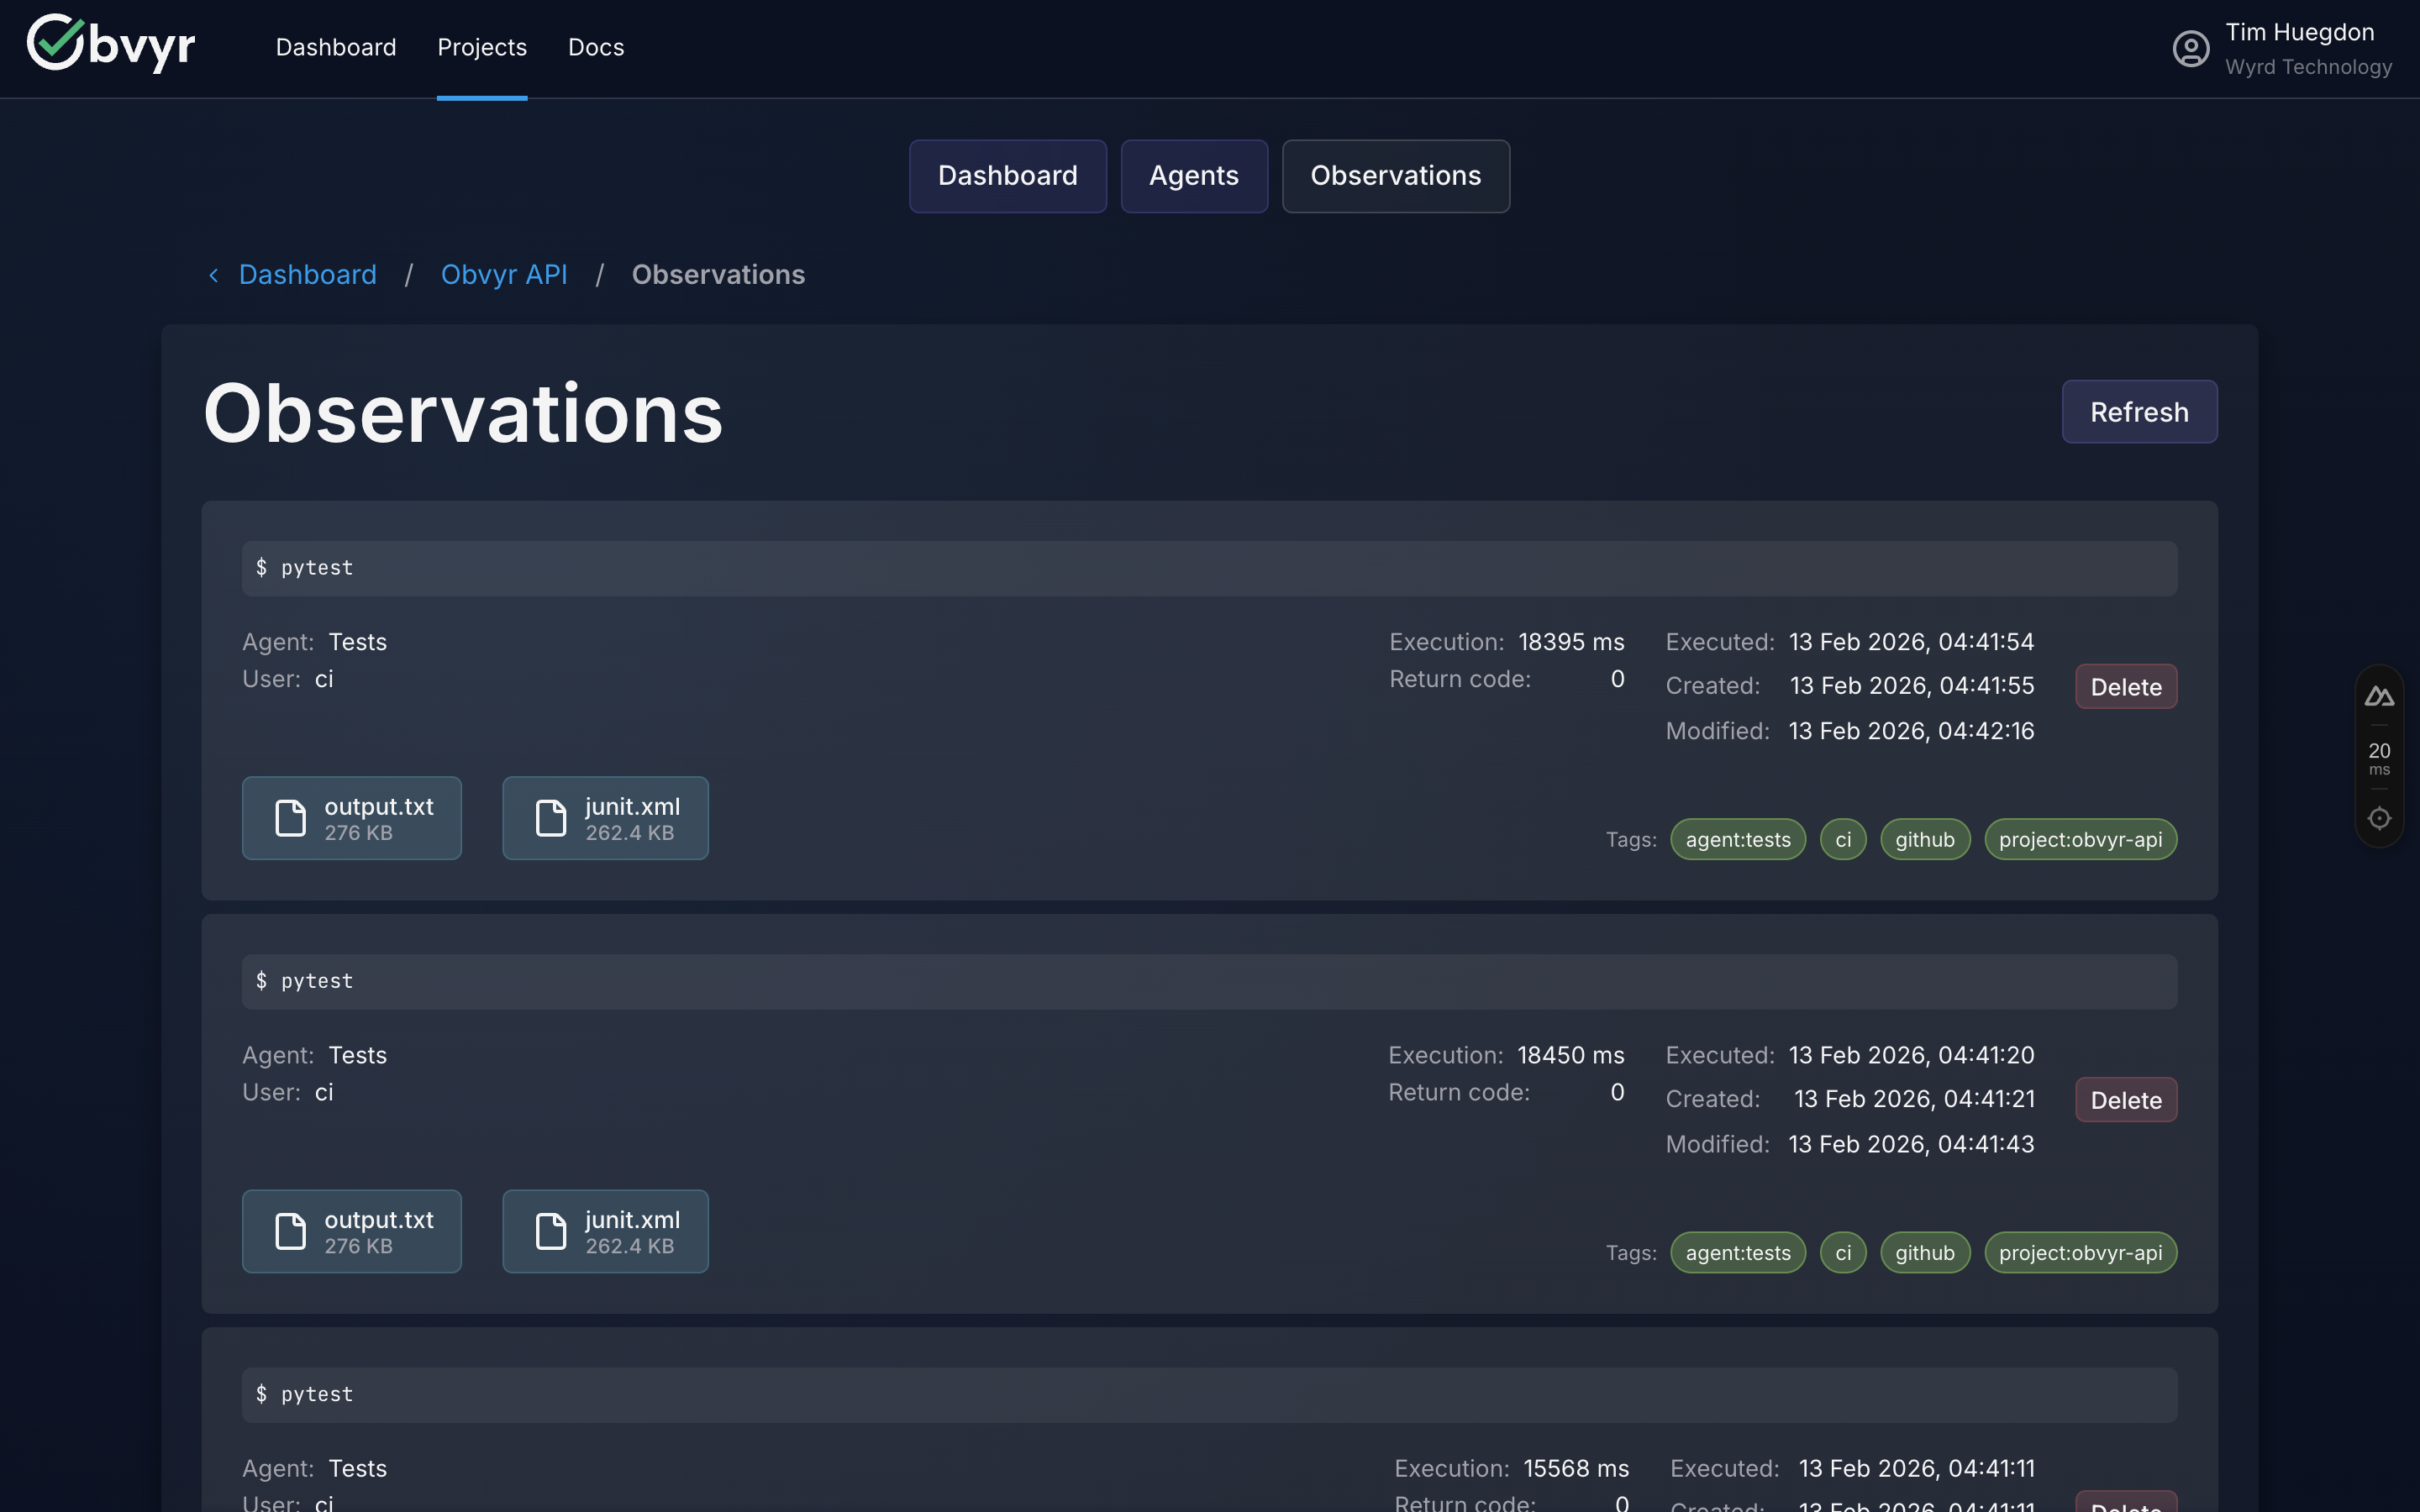
What you'll see:
- Full command output
- Execution timing and duration
- Environment context (user, timestamp, system info)
- Test framework metadata (if JUnit XML available)
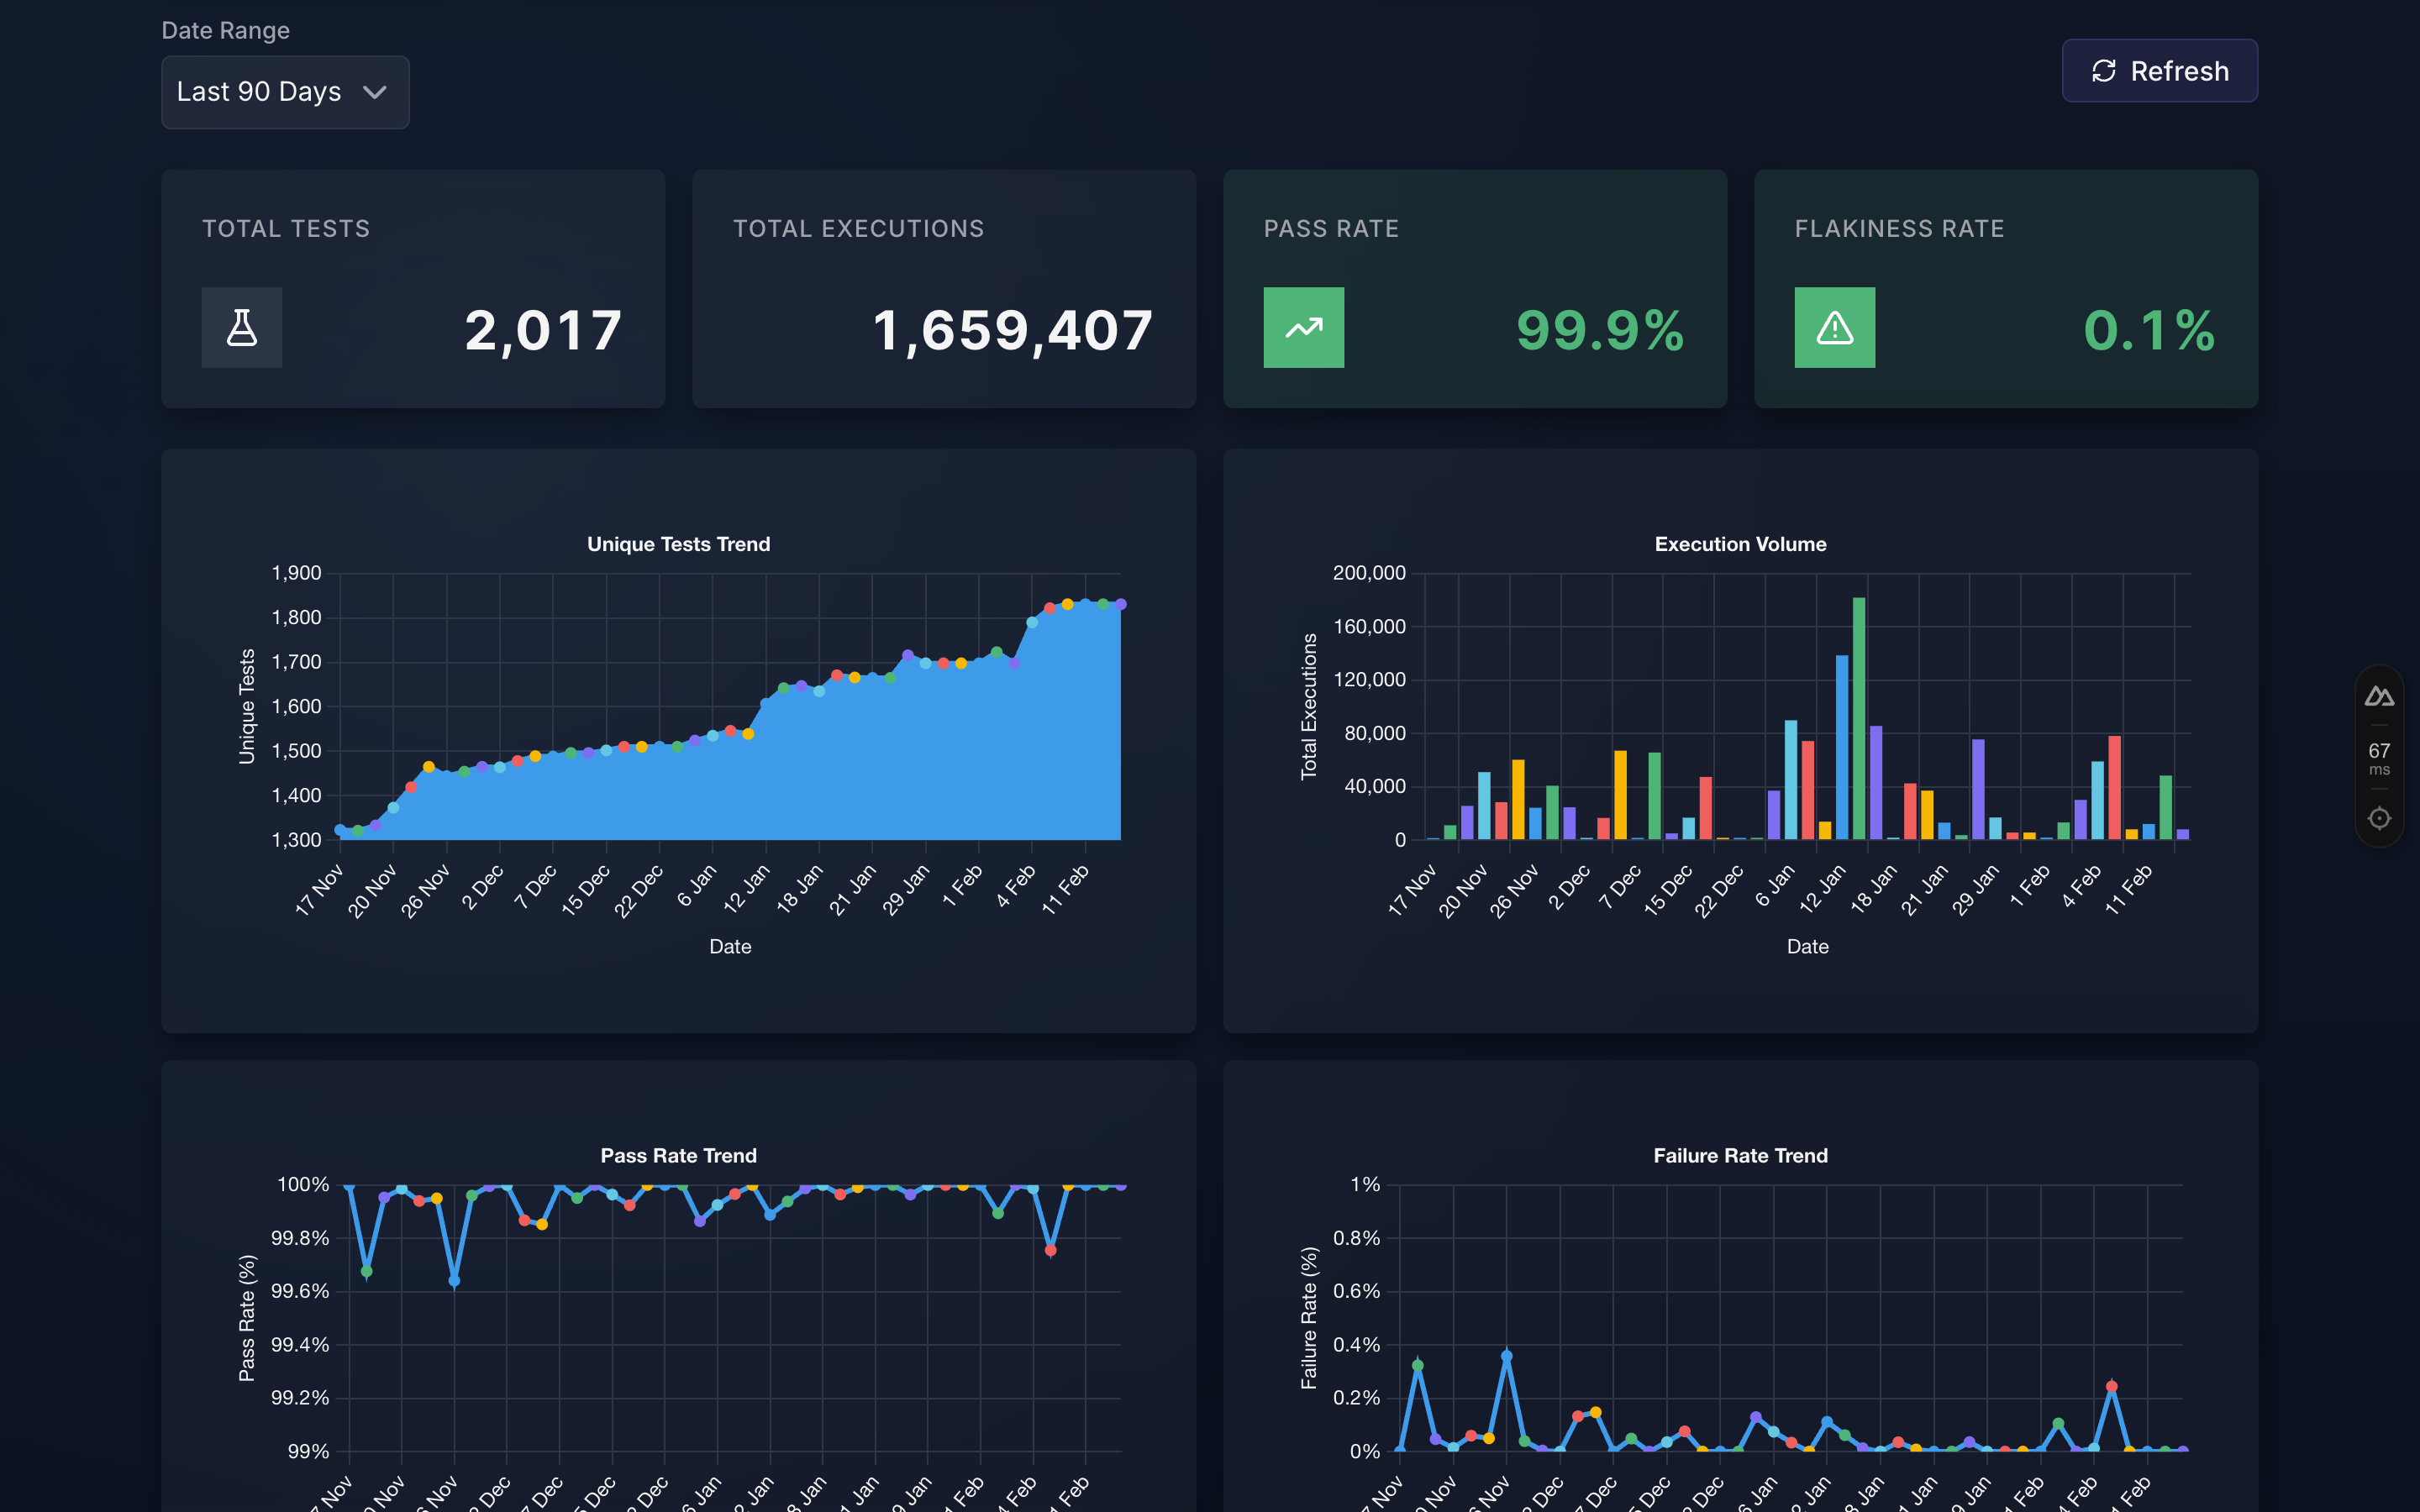
What this becomes: After 50-100 executions, individual observations become patterns. You'll see which tests are flaky, how local differs from CI, and where your test suite provides value.
Next Steps: Maximise Value
Immediate: Add CI/CD Integration (10 minutes)
Get the most value by capturing both local and CI executions:
GitHub Actions (using uvx - recommended):
yaml
env:
  OBVYR_CLI_USER: github-ci
  OBVYR_PROFILES__DEFAULT__API_KEY: ${{ secrets.OBVYR_API_KEY }}
  OBVYR_PROFILES__DEFAULT__ATTACHMENT_PATHS: test-results/junit.xml

steps:
  - uses: astral-sh/setup-uv@v6
  - name: Run tests with Obvyr
    run: uvx obvyr-cli pytest --junitxml=test-results/junit.xml tests/
GitLab CI (using uvx - recommended):
yaml
variables:
  OBVYR_CLI_USER: gitlab-ci
  OBVYR_PROFILES__DEFAULT__ATTACHMENT_PATHS: test-results/junit.xml

test:
  before_script:
    - pip install uv
  script:
    - export OBVYR_PROFILES__DEFAULT__API_KEY=$OBVYR_API_KEY
    - uvx obvyr-cli pytest --junitxml=test-results/junit.xml tests/
Jenkins (using uvx - recommended):
groovy
environment {
    OBVYR_CLI_USER = 'jenkins-ci'
    OBVYR_PROFILES__DEFAULT__API_KEY = credentials('obvyr-api-key')
    OBVYR_PROFILES__DEFAULT__ATTACHMENT_PATHS = 'test-results/junit.xml'
}

steps {
    sh 'pip install uv'
    sh 'uvx obvyr-cli pytest --junitxml=test-results/junit.xml tests/'
}
Why uvx for CI/CD?
Using uvx in CI/CD pipelines:
- No persistent install of obvyr-cli - runs directly without
pip install obvyr-cli - Always uses latest version - automatic updates without maintenance
- No dependency conflicts - doesn't interfere with your project's dependencies
Short-Term: Add More Test Types (5 minutes per agent)
Create separate agents for different test suites:
bash
# Unit tests
export OBVYR_PROFILES__UNIT__API_KEY="unit-agent-token"
obvyr-cli --profile UNIT pytest tests/unit/ --junitxml=test-results/unit.xml

# Integration tests
export OBVYR_PROFILES__INTEGRATION__API_KEY="integration-agent-token"
obvyr-cli --profile INTEGRATION pytest tests/integration/ --junitxml=test-results/integration.xml

# End-to-end tests
export OBVYR_PROFILES__E2E__API_KEY="e2e-agent-token"
obvyr-cli --profile E2E npm run test:e2e
See CLI Configuration for multi-profile setup details.
Ongoing: Build Evidence (50+ executions)
After 50-100 executions, you'll see:
- Flaky test identification - which tests fail inconsistently
- Pattern insights - correlation with users, environments, timing
- Test-level metrics - pass rates, execution times, failure patterns
The transformation:
- First run: "Test passed in 1.2s" (data point)
- After 50 runs: "Test passed 47/50 times (94% reliable), fails only in CI, pattern suggests network timeout" (insight)
Troubleshooting
"Command not found: obvyr-cli"
If using uvx (recommended): Always use the full uvx obvyr-cli command. No PATH configuration needed.
If using pipx or pip: Ensure the installation directory is in your PATH.
bash
# Check where pipx installs binaries
pipx list

# Add to PATH if needed (add to ~/.bashrc or ~/.zshrc)
export PATH="$PATH:$HOME/.local/bin"
"Configuration 'DEFAULT' not found" Error
You haven't set the required OBVYR_PROFILES__DEFAULT__API_KEY environment variable.
bash
# Check if it's set
echo $OBVYR_PROFILES__DEFAULT__API_KEY

# If empty, set it
export OBVYR_PROFILES__DEFAULT__API_KEY="your-token-here"
Observation Not Appearing in Dashboard
- Check network connectivity: Ensure you can reach
https://api.obvyr.com - Verify API token: Ensure you copied the correct token from Step 2
- Check agent status: Ensure your agent is active (not disabled) in the dashboard
- Review CLI output: Run with verbose logging to see what's happening:bash
obvyr-cli --verbose pytest tests/
Tests Fail When Wrapped with Obvyr
The CLI should never affect test outcomes. If tests pass without obvyr but fail with it:
- Check for output buffering issues: Some test frameworks buffer output differently
- Verify no environment variable conflicts: The CLI adds
OBVYR_*env vars - Report the issue: This is unexpected - please report at github.com/wyrd-technology/obvyr
Explore Further
- CLI Configuration - Advanced setup: tags, attachments, multiple profiles
- Gradle Plugin - Zero-wrapper integration for JVM/Gradle projects
- Collect API Reference - Build a custom integration for any stack
- Why Obvyr? - Understand the complete value proposition
- Problems Solved - See specific testing challenges Obvyr addresses
- FAQ - Common questions and answers
You're Now Collecting Evidence
Congratulations! Every test run from every developer and every CI pipeline now contributes to proving test reliability.
Keep Running Tests
The more you and your team use Obvyr, the stronger your evidence becomes. Patterns emerge from data. Run your tests through Obvyr consistently, and insights will follow.